Ways to manage products
Products can be physical products or services that are intended to be quotable. It can be a product page or any page where you would like to place the quote request button.
If you have your Dealia account integrated with a platform like Shopify or WordPress, you should already have all your website products or / and pages displayed in the Products > External products tab in the Dealia admin panel. In this case you don’t need to add any products manually. However if your website is custom-built or is developed on a platform not covered in our integration section, then you can add your products manually.
Add new product
In order to add a new product do the following:
- Go to the Dealia admin panel and click the “Products” tab.
- Click on the “+ Add new product” button.
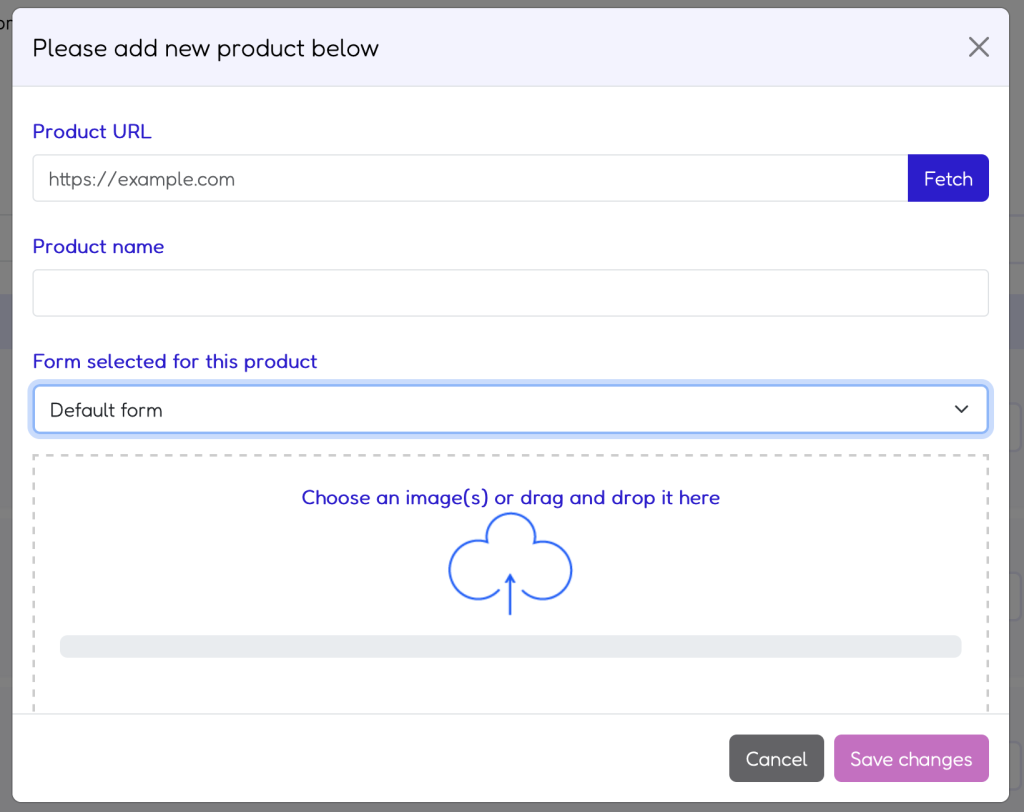
- The pop-up window displays. It includes the form with the following fields:
- Product URL – here you need to paste the link to the page that should have the quote request button displayed. Click the “Fetch button” visible next to that field. Usually it automatically populates the rest of the fields (except for the form field). If it doesn’t, or the auto-populated data is not correct you can manually adjust or add the missing data.
- Product name – the product or service name.
- Form selected for this product – choose a form that you’ve previously created in the Forms tab. It should be a form that will collect all the required information from the customer needed to prepare a quote. This form will display on the page once the customer clicks the quote request button.
- Choose images – if not automatically fetched, you can upload or drag and drop any image in the standard format that is below 2MB. You can upload many images at the same time.
- Once all fields are filled, click the “Save changes” button.
The new product should display on the product list.

Edit product
You can edit a product by doing the following:
- Go to the Dealia admin panel and click the “Products” tab.
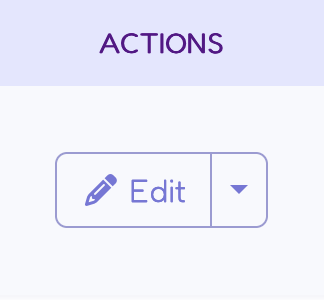
- In the product list there is an “Actions” column which has an “Edit” button. Click it to edit the chosen product.
- After all is updated click the “Save changes” button.
Assign form to a product
The form can be created in the Forms tab. It will display on the given product once the quote button is clicked by the customer. Only products that have any form assigned will have the quote request button displayed.
You can assign a form to a product by doing the following:
- Go to the Dealia admin panel and click the Products tab.
- In the product list there is a “choose form” column. Choose a form from the drop down list and assign it to the product of your choice.
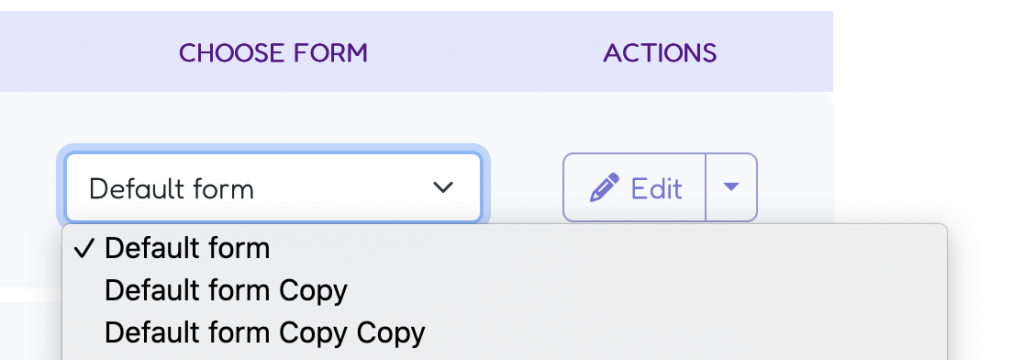
Alternatively you can change a form by clicking the edit button, but the above option is much quicker.
Product search options
Once you have a long list of products, you can search and sort it to easily find what you are looking for. There is a bar just above the products list which includes:
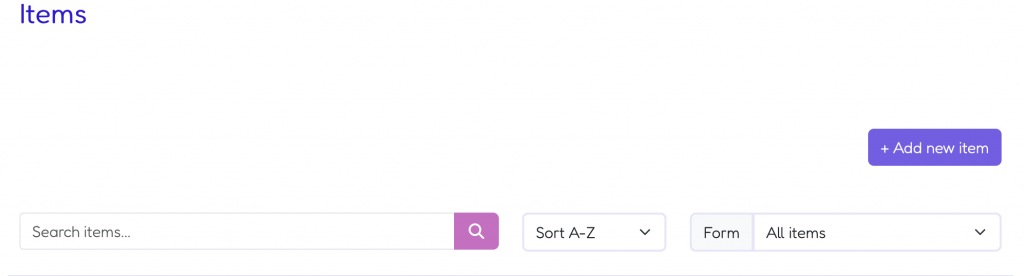
- Search box – you can search products here by name.
- Sort – this is a drop down that allows you to sort the products alphabetically, from A to Z or from Z to A.
- Form – this is a drop down that includes the list of all the forms that you’ve created. You can sort here the products by the form that they have assigned.
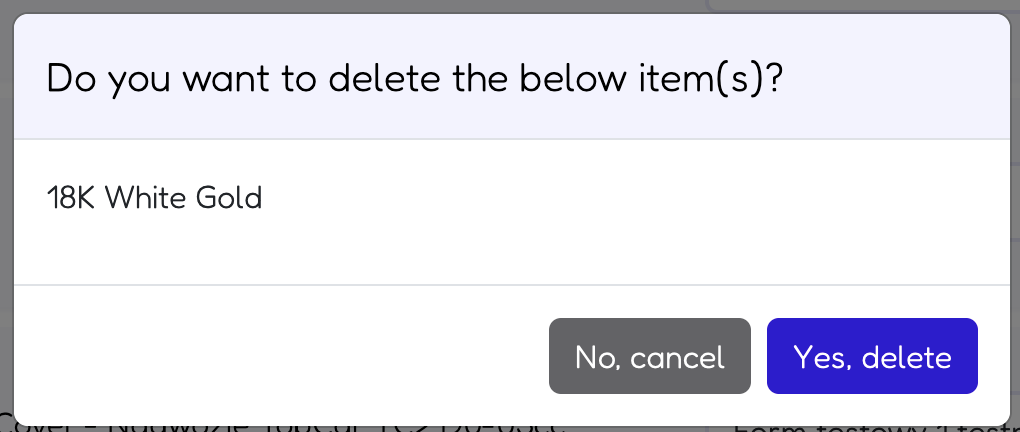
Delete a single product
You can delete a product by clicking the drop down arrow next to the “Edit” button. Then you will see a pop up where you need to confirm that you wish to delete the selected product.
Delete multiple products
In order to delete more products, you can use a tick box next to the product and select multiple products there. Then the panel with the “delete selected” button will display. Click on it and confirm that you would like to delete the listed products.

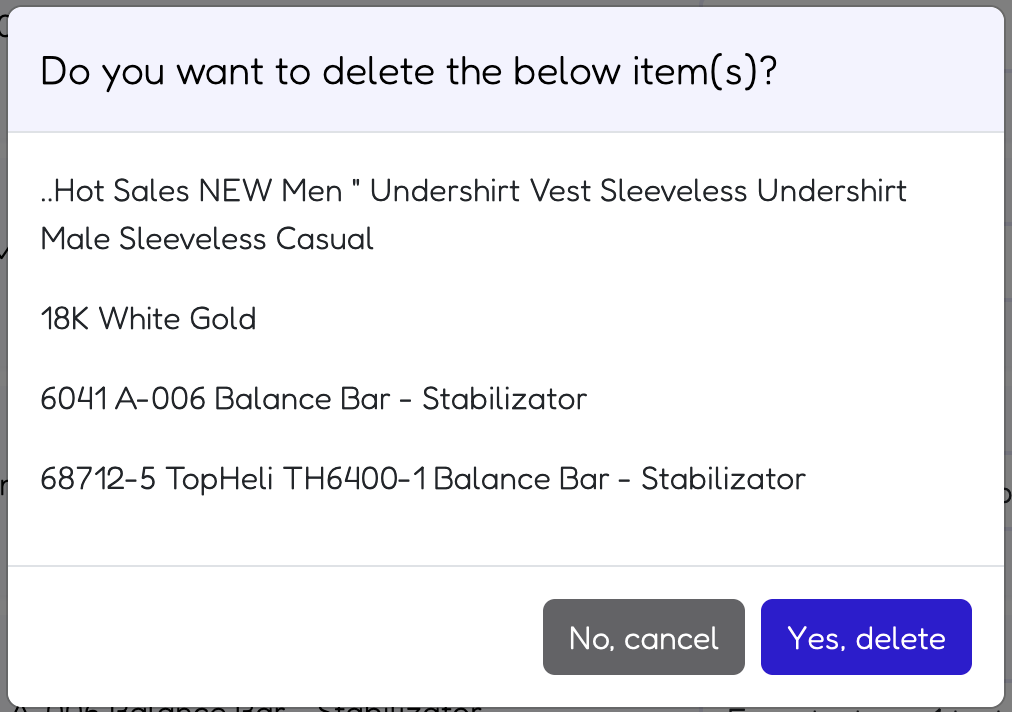
You can use search to find the products that need to be deleted.